I admit it. I’m prejudiced against sugar cookies. Surprisingly, it’s not the white flour or white sugar that bothers me. I think there is room in our diet for the occasional treat – and homemade is always better. It’s not they way they look, for sure. If they are decorated well, they are really cute. However, I’ve always thought that cuteness was the only thing they had going for them. Flavor wise, they’re too bland and too boring. Beyond that they are messy and super time consuming to make. Confession: I am also the teeniest bit afraid of trying my hand at icing. It looks hard. My prejudices aside, we make sugar cookies – every year at Christmas. Because our flood put me a few weeks behind in Christmas preparations, we didn’t get around to making any this year. On Sunday, while Walt and Newt were watching the Super Bowl, I looked around online for a sugar-cookie recipe that might be tastier than sawdust. Once I found a promising recipe, I whipped up a batch and stuck it in the fridge. Last night I surprised Walt and Newt with a family cookie making party.
See what I mean about messy?
I was going for Valentine’s Day cookies, but we ended up with a mishmash of holidays: hearts, bats, birdhouses and stars decorated with red and green sugar. Perhaps everyone was afraid that this would be the one and only sugar cookie making session of the year. They had to get their favorites in. Want to know something though? These cookies are actually really good. They are firm enough to not crumble when dipped in my herbal tea, but still slightly soft. And that buttery taste with just a hint of lemon? Let’s just say, I now have a new outlook on sugar cookies. I might even try icing them one day…
Bee in Our Bonnet has the recipe I used, as well as fantastic decorating tips and tricks. The only modification I made to the recipe was using about a teaspoon of grated lemon zest instead of the lemon extract.
We are coming to end of this chicken, but can you believe how far we’ve been able to make it stretch? Today, we’re talking stock (or broth). Chicken stock is truly a wonderful thing to make. Like my homemade veggie stock, it’s made with the scraps that you would otherwise throw away. At the store stock costs about $3 a quart. One chicken carcass (ew) will make me about a half gallon of stock. Not only is it cost effective, it tastes wonderful – far better than what you could buy, you know exactly what is in it, and costs far less. Here’s how to make it: Take your chicken carcass and put it in your largest stock-pot (see why it’s called that now?). Fill pot with cold water. Add a generous splash of white or apple cider vinegar. This will help to break down the bones and add more minerals to your stock. Let set for about a half an hour, then add chunks of celery, carrot, onion and garlic. No need to peel anything (even the onion and garlic); just give it a good scrub and a rough chop before dropping it in all the pot. Turn on burner to high and bring to a good rolling boil, then reduce heat to simmer. Simmer for anywhere from 12 to 36 hours, adding more water as necessary. When you see foam forming on the top, skim it off with a spoon and discard. In the last hour or two of cooking, feel free to throw in some herbs, if desired: parsley and thyme are my favorites. Warning: Your house will smell wonderful. Make sure you have something good planned for dinner. After you have simmered your stock for the desired amount of time, remove from heat and allow to cool. This will make it easier to handle. Strain through a colander. If you prefer a more clear stock, you can line your colander with linen, but I usually don’t bother. Pick through the bones and separate the meat. Store in fridge or freezer. Discard everything else (even the veggies – there is nothing of value left in the. It’s all in your stock). There will likely be a layer of fat on the top of your stock. I generally leave it, but if you find that it makes your finished stock too oily, just place the entire bowl in the fridge. The fat will rise to the surface and harden. It can then be picked off and thrown away. (Or used to make chicken gravy.) I like to put my finished stock in wide mouth quart jars and freeze until needed. Just don’t overfill or they could burst in the freezer. Leave a couple of inches of headroom. I made soup with our stock for lunch yesterday. Full disclaimer, this was actually made with turkey stock. The chicken stock wasn’t quite ready, but it smelled so good… I went to the freezer and pulled out some leftover meat and turkey stock I had made after Christmas. While it was thawing, I had Newt cut some kale from the garden. This, I sauteed with celery, carrot, onion and garlic. I added the stock, meat, a handful of pasta (though rice or barley are also good), and salt and pepper. Lunch was on the table in less time than it would have taken to heat up frozen fish sticks.
If you have never tried cooing a whole chicken before, I hope you are feeling a little more confident about it. None of the dishes I made this week required a whole lot of special skills or equipment, but each one of them tasted great. Go ahead and try it. Don’t be chicken!
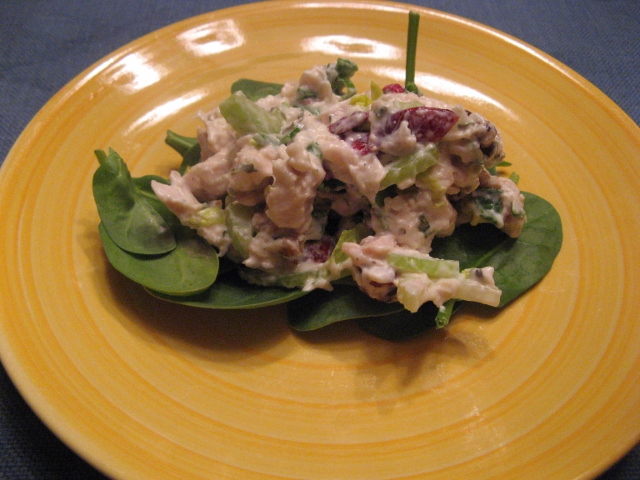
Besides being tasty, let’s talk about another reason why buying the whole chicken makes sense, or should I say makes cents? That’s right, I’m talking about the $$$. I bought my chicken, full price, for about $6. Monday night, I made a beautiful and delicious roast chicken; let’s call that meal #1. After dinner, I stripped the remaining meat off the frame and stuck both meat and bones in the fridge. Yup bones, too, but that’s tomorrow’s post. Yesterday, just before lunch I pulled out the leftover chicken and got ready for meal #2: Cranberry-Walnut Chicken Salad. I had about 2 cups of chicken left over, but we are a small family. If you have less left, just estimate and adjust your other ingredients to make the chicken salad. It’s a really forgiving recipe. If you have no chicken left over, that’s sad. Next time make two chickens. You can’t go wrong with having extra chicken around the house. Besides chicken salad, cooked chicken comes in handy for topping green salads, making wraps or sandwiches, casseroles, soups, chicken enchiladas or burritos, chicken kabobs, chicken-gumbo, chicken fricassee… sorry, I just started channeling Benjamin Buford ‘Bubba’ Blue for a minute. Anyway, my point is, cooked chicken is a good thing to have around.
Sweet and chewy cranberries, crunchy celery and walnuts and tangy yogurt combine with chicken for a salad sensation. If you feel the need to eat it straight from the bowl, standing in front of the open refrigerator, I won't judge. I've done it myself.
Ingredients
2 cups cubed cooked chicken
½ cup dried cranberries
¼ cup walnuts, chopped
½ cup celery, sliced
3 green onions, sliced
3 Tbs mayonnaise
¼ cup plain yogurt
1 tablespoon lemon juice
1 Tbs dried oregano
1 tsp salt
Freshly ground black pepper, to taste
Instructions
In a large bowl, combine chicken, cranberries, walnuts and onions; mix well.
In a small bowl, combine mayonnaise, yogurt, lemon juice, oregano and pepper; pour over chicken mixture. Mix gently.
Tastes best if you have time to refrigerate, covered, for 1 to 2 hours.
Let’s talk chicken. Sure, we are all familiar with the boneless, skinless variety, but can I be frank? Those can be a bit, um… boring. This week, I’m going to help you to break you out of that chicken rut. Let’s start by embracing the whole bird, shall we? Um… not like that. Awkward.
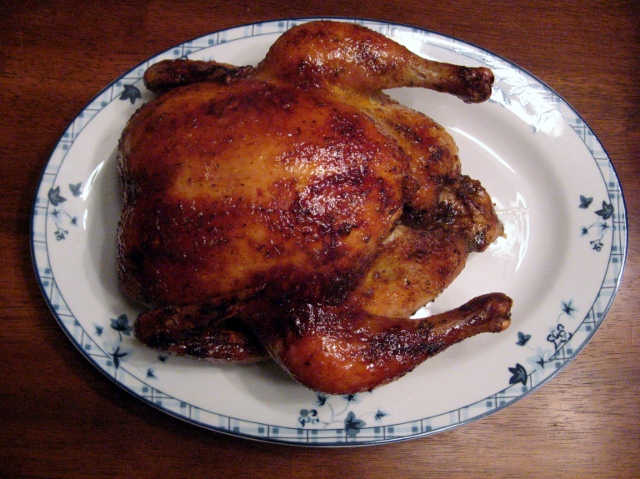
Want to feel like a hero in the kitchen? Put this on the dinner table:
Sweet and Spicy Roast Chicken
I made this dish for dinner last night. My family raved over it, and gave me enough praise to fill my little middle-child heart with glee. What they don’t know it this: roast chicken ranks right up there with spaghetti and baked potatoes on the cooking difficulty scale. This is one dish where the outcome far outweighs what you put into it. Want to make things really easy? Throw some potatoes in the oven to bake while the chicken is roasting. If you round things out with salad, making it will be the most difficult part of the meal.
Don't fear the chicken. Roast chicken is honestly one of the easiest foods there is to make, but we can keep that a secret. Your family will think you've slaved all day over this sweet and spicy masterpiece. Go ahead and let them do the dishes.
Ingredients
One whole fryer
Olive oil
Spice rub for poultry (mine has sage, thyme, salt, pepper, paprika, garlic and parsley in it), season salt, or salt and pepper
¼ cup apple jelly
¼ cup honey
½ - 1 tsp fresh grated or jarred ginger
¼ - ½ tsp cayenne pepper
Instructions
Preheat oven to 375°.
Begin by preparing your chicken. Remove from packaging and reach your hand in the cavity (trust me, this dish is worth it). Pull out any giblets, large fat deposits and/or neck. Set aside for another dish or discard.
Trim any loose skin and tail, if desired. (The tail question comes down to aesthetics. I usually leave it, because I am a lazy cook.)
Rinse chicken, inside and out with cold water. Pat dry with paper towel.
Place chicken on a rack in a baking pan, breast side up.
Rub entire bird with olive oil. Liberally sprinkle on spice rub, season salt, or salt and pepper and lightly rub in.
Place chicken on lower-middle rack in oven and roast for about 25 minutes, to start.
While chicken is roasting, prepare glaze: Combine apple jelly, honey in a small dish. Stir. If jelly does not break down and combine well, microwave mixture for 30 seconds to melt.
Add ½ teaspoon of ginger and ¼ teaspoon of cayenne. Taste, then add more of each, if desired.
After cooking chicken for about 40 minutes, remove from oven and spoon half of the glaze over the bird, taking care to cover legs and wings.
Return chicken to the oven for another 15 minutes. Remove and cover with the remaining glaze. If wing tips are beginning to look overly brown, cover them with foil.
Place chicken back in the oven and cook until juices run clear and thermometer inserted in the thickest part of the thigh reaches 165°. Take care not to touch the bone with the thermometer; that would give a false reading.
Total cooking time should be between 1 and 1½ hours, depending on the size of bird.
Sometimes I like to pretend that my life is a musical.
I often bust out into whatever song I feel is appropriate, much to the embarrassmentadmiration of my friends and family. Even when I’m not singing out loud, there is almost always a song running in the back of my mind. When I pay attention to it, I find that the words usually relate to whatever I am experiencing at the time. For example: a couple of months ago, smack in the middle of my personal winter, I spent several days with The Lion King’s The Circle of Life running through my head. I had no idea why, and frankly, I was beginning to get a little annoyed by it. However, when I took the time to pay attention, I realized that the predominate lyrics I was thinking on were: There’s more to see than can ever be seen/More to do than can ever be done, Lightbulb: I was silently belting out my feelings of anxiety and stress. Realizing that did absolutely nothing to relieve my stress, but at least I understood the soundtrack.
On a happier note (Ha! See what I did there? Song? Note? … Hello?), I’m pleased to report that for the last three days in a row, I have awakened to this song in my head:
Go ahead and listen. You can’t help but love it.
Here are a few things that are making me smile today.
one The flood water is receding. Note: It took me three tries to type w-a-t-e-r. My fingers kept wanting to type w-a-l-t-e-r. Walt is not receding. Thinning a bit, yes, but definitely not receding. Not only is the water level going down, but we have had honest to goodness sunshine in patches over the weekend. Me, suddenly bursting into song: I’m walkin’ on sunshine, yeah, yeah and don’t it feel good? This is the kind of thing that people who know me well have to put up with all the time.
two The slug slime came up off my couch. All I had to do was wait for it to dry, then scrape it off and then seal off and fumigate the entire area with napalm. Now it’s gone, gone, gone, whoa-oh-oh-oh-whoa…
three Things are getting done. Hurray! Our remodeling/repair job feels like it is taking for-ev-er, but progress is being made. For example, we once again have two (count ’em: one, two!) functioning bathrooms. The hall bath has received a complete makeover, including new tile flooring, new cabinets and sink, granite counter top, and a brand new no overflow toilet. Haaaallelujah, haaaaallelujah, hallalujah-hallalujah, hall-ayyyy-ay-lu-yah! We’ve still got some finishing touches to do; I’ll share pictures soon.
three-and-a-half Remember this? We found that old window at a garage sale back in September and I had such big plans for it. On Saturday, I batted my eyelashes and sweet talked Walt into finally helping me bring those plans to fruition. The following horror was our entry when we first moved into our house. If you have small children on your lap, you may wish to cover their eyes. We have done a fair amount of work there: replacing the front and closet doors, tiling over the ugly vinyl (not pictured) with a pretty matte black granite, replacing and painting the wood trim, and utterly demolishing those terrible prison bars spindles. Still the area didn’t look finished. Without the spindles, we had a hole in the wall that looked to me like a walk up ice-cream counter. Enter new-old window: Please note the new curtains too. Love. Them. Here is another peek at my window: This afternoon Newt told me: “Mama- I love that she calls me that… “Mama, if we sit right here on the couch and look at the front window and the entryway our house looks done. Let’s just not turn around briiiight eyes.” Agreed. I’m not going to turn around and see my plywood and 70’s vinyl flooring (now with more asbestos!). …but the view I love the most is on my front porch lookin’ iiiin!
four Our church has multiple congregations that meet in the same building. Every year we trade meeting times around. Last year, we went to church at 8:30. AM. Twice a month I had early morning meetings. At 7:00. AM. As in, in-the-morning. Aye-yi-yi, that’s early. This year, we meet at 12:30. Sunday mornings are slow and relaxed again. We stay in our pjs for awhile, walk the dog together, make breakfast… It’s heavenly. That’s why I’m eeeasy, easy like Sunday mornin’…
four and three-quarters Newt made breakfast for us yesterday. I found her a recipe for pumpkin muffins and she went to work. They’re whole-wheat with no refined sugar, using honey instead, and oh-my-yum. The only modification she made (she is my daughter, after all) was adding some pumpkin seeds and walnuts to the batter. Want some? The recipe is right here. Why are there so many songs about muffins, and what’s on the other side? Oh yeah, I also make up my own lyrics. Why not? It’s my show life.
First of all, thanks for all your kind words yesterday. I really appreciate your support. Okay, enough sharing of the feelings: let’s eat. Last week’s BlogHer Book Club review has got me thinking about all those good Omega 3s (and chocolate) that my body needs. Banana Bread to the rescue! Where you will find Omega 3 oils in this recipe:
Farm-fresh eggs and milk: grass fed animals produce higher omega 3s in their meat, milk and eggs (though store bought products will still make a great-tasting and good for you banana bread).
Nut lovers rejoice! Walnuts are high in omega 3s.
Just to take it over the top, there’s 1/4 cup of ground flax for mega-omaega 3 power!
None of that would matter much though if it didn’t taste amazing, right? Go ahead and eat half the loaf while standing over the kitchen sink. I won’t judge. It’s a health food.
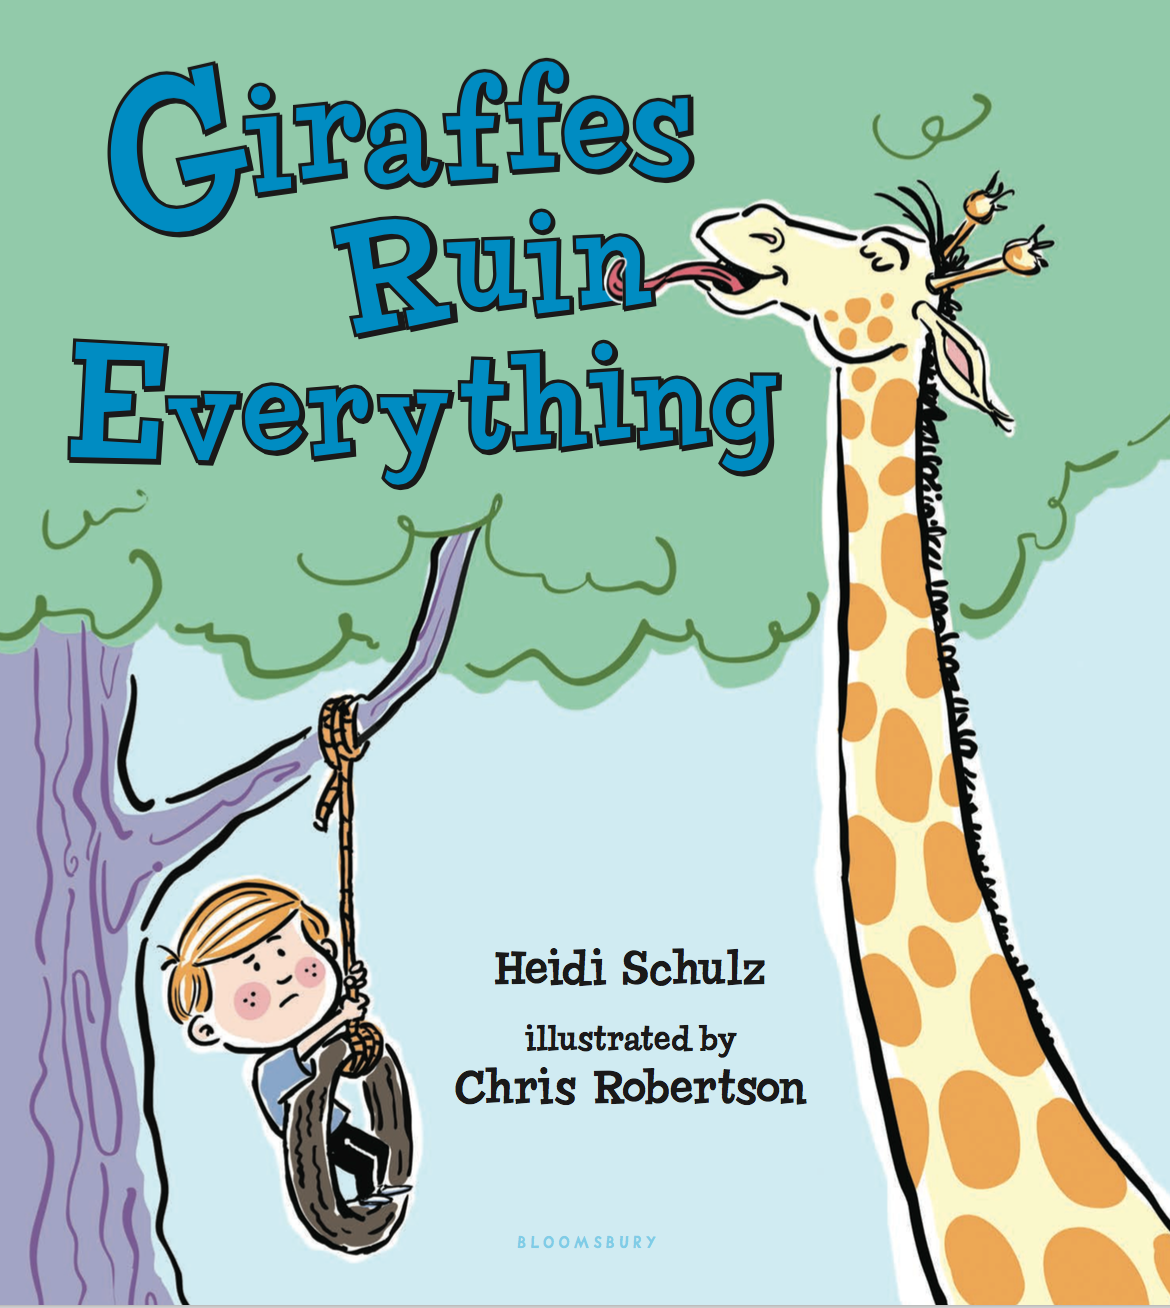
Lies to children for fun and profit. NYT Bestselling author of Hook's Revenge, Hook's Revenge: The Pirate Code, and Giraffes Ruin Everything.
I write books, like these:
Want signed copies?
Call my hometown bookstore, The Book Bin at 503-361-1235, and place an order!
This is my blog.
I have a newsletter.
Do you like my book and event news, prizes, and having fun? Do you enjoy receiving emails from me, but no more often than once every month or two? Well, then, this newsletter is perfect for you! Register here.