by Heidi Schulz | Jul 14, 2011 | Heidi Bosses You, Make Me

Crunchy Betty has challenged me to a duel to wash my face with nothing but huh? honey (and a little water) for the next two weeks.
Well Betty, I accept. But I hope it turns out better for me than when I tried the oil cleanse method. I know the OCM works for a lot of people, but sadly, I am not one of them. It took me nearly a year to get my face back to a somewhat normal condition.
Here’s hoping that honey is sweet to me.
Want to join the challange? Find more information here.
Challenge starts Monday. I’ll keep you updated.
Read more about my sweet skincare:
Honey Challenge: Before
Honey Challenge: Update #1
Honey Challenge: Update #2
Honey Spice Facial Scrub
Like this:
Like Loading...
by Heidi Schulz | Jul 12, 2011 | Heidi Bosses You, Make Me
Newt is not a moderate child. She does not do things half way. Instead she throws herself in to her passions with wild abandon. I am often enlisted to help bring her visions to pass.
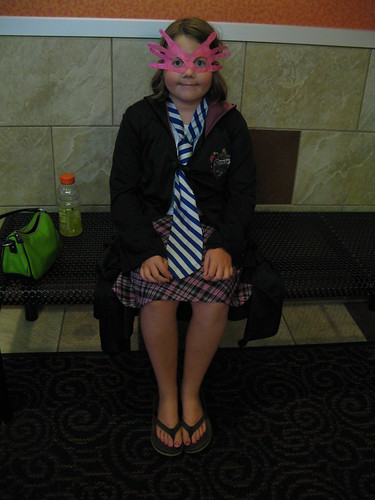
Two summers ago, she asked me to help her become Luna Lovegood for Harry Potter 6.
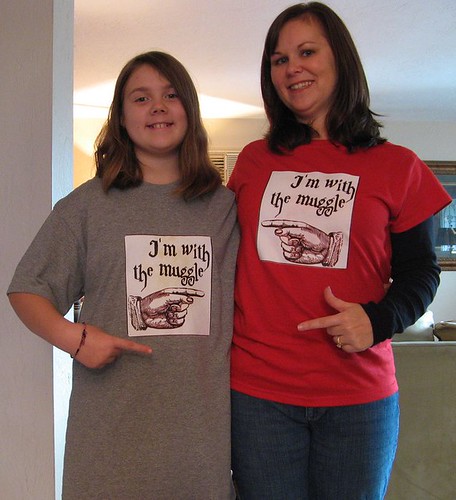
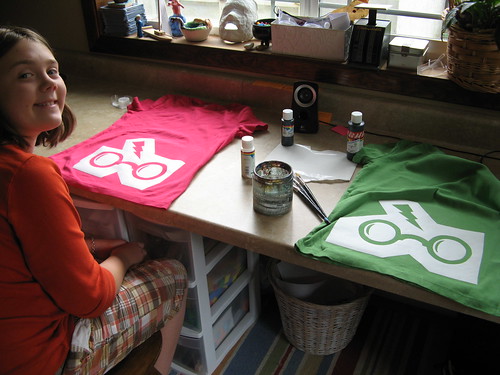
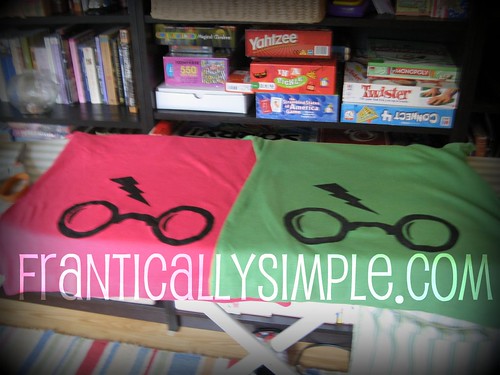
When HP7.1 opened this fall, she decided that themed t-shirts would be the thing. We worked on the concept together and I used our printer and iron on paper… with less than stellar results.
I have been instructed to come up with cool t-shirts for HP7.2. I was considering the issue in the shower yesterday morning (that’s where I do my best thinking, you know). Out of the blue, inspiration struck. After a quick dress and blow-dry I sat down at my laptop. Ten minutes on Publisher and this design was born.
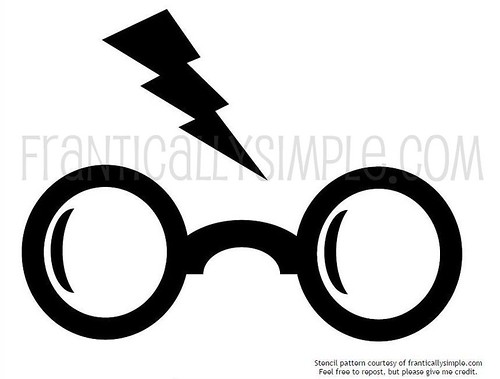
You like? Here’s one for you: Harry Potter t shirt stencil PDF download.
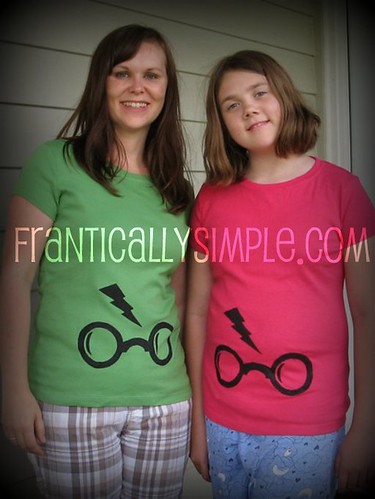
Newt and I model the finished product
Now it’s your turn
Needed:
Note: I have linked to the needed items on amazon, though you should be able to find all of them at local craft and/or grocery stores (and possibly get better prices). If you do purchase through my links, I get a very small commission. Thanks.
t-shirt, prewashed (ours came from the children’s department of Target, $4 each)
freezer paper (check the grocery store near the tin-foil)
xacto knife
cutting mat (I like using a glass mat , but rubber/self healing mats
 are fine or even a piece of heavy cardboard will work in a pinch)
ironing board and iron
fabric paint or acrylic paint
 and textile medium
 (Amazon did not have any smaller bottles. Our 2 oz. bottle cost about $3.)
light cardboard or manilla folder
Another note: This was my first time using a freezer paper stencil, but it was very easy to work with.
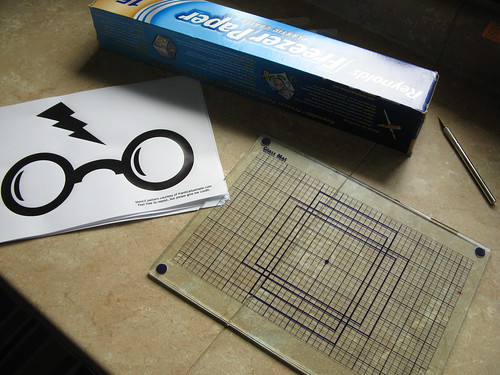
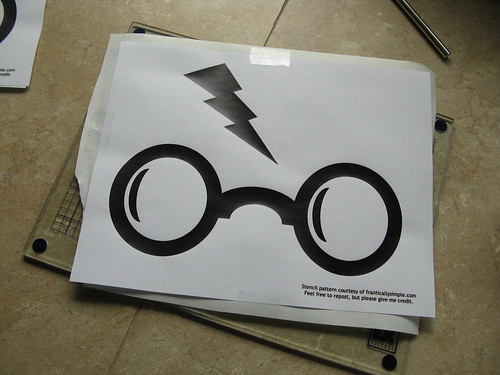
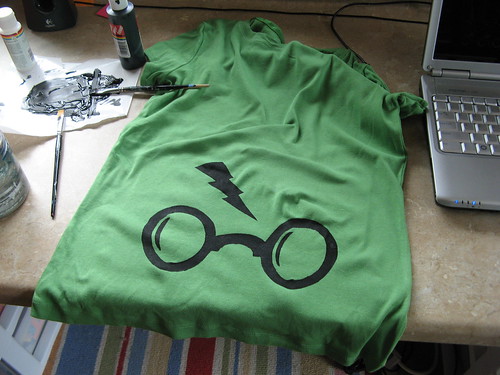
Download and print design (or create your own).
Tear off a piece of freezer paper. Notice that it has a shiny side and a matte side. Place it shiny side down and cover it with your design. Tape together.
Get out your xacto knife, but remember, it’s sharp! Don’t cut your fingers. I like to use a new blade so it cuts really well. If you haven’t changed your blade in awhile, now might be a good time to do so.
Starting from the center of your design and working outward, cut around the black parts.
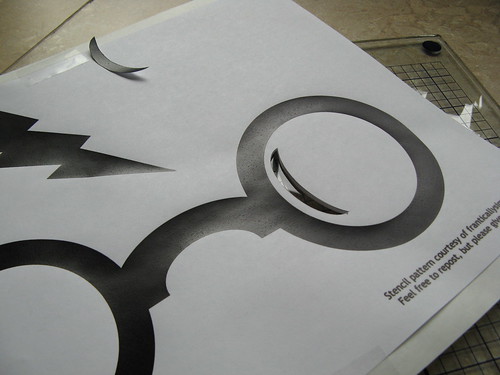
Go ahead and discard the freezer paper that was under the black parts of the design, but keep the ones that were under the white (the glasses “lenses”).
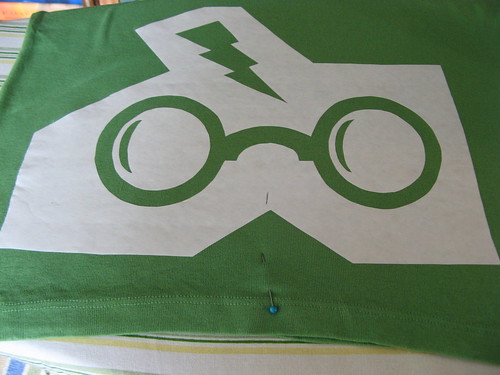
When finished, remove tape and trim your stencil. Mark the center with pencil or pen.
Find the center of your t-shirt and mark with a pin. Place stencil on t-shirt, lining up marks to ensure stencil is centered on t-shirt. (Just use the main part of the stencil for now; reserve the lenses for a few moments.)

Note: to keep this design from looking like a Hooter’s t-shirt, we chose to place the stencil on the bottom third of the shirt.
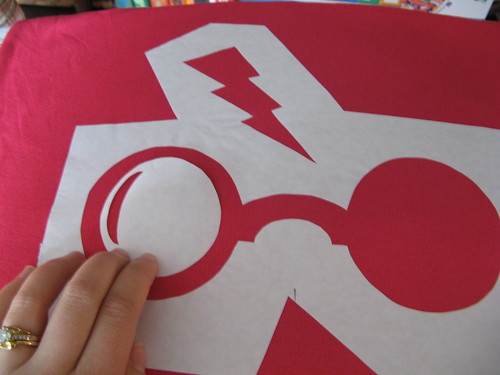
Make sure that the stencil is shiny side down and iron in place with a hot iron.
Then place in lenses and iron them in as well.
Place a sheet of light cardboard between the layers of your shirt to keep paint from bleeding through to the back. (We used manilla folders.)
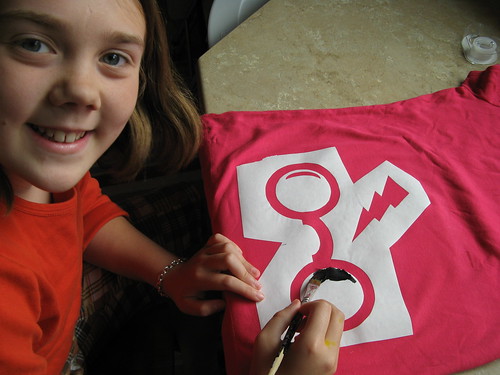
Get ready to paint.
If you are using fabric paint, you are ready to get your brush wet. If you are using acrylic paint (my choice for all the color options), you will need to prepare it for textile use. This keeps it from washing out. This is simple to do with the use of a textile medium.

Follow the instructions on the bottle. Ours said to mix one part medium with two parts paint. We used a scrap of freezer paper for a palette. Eyeball the amounts, pour and mix.

Use a paintbrush to paint directly over the stencil making sure to cover evenly. If needed, do a second coat.
Wait until dry.
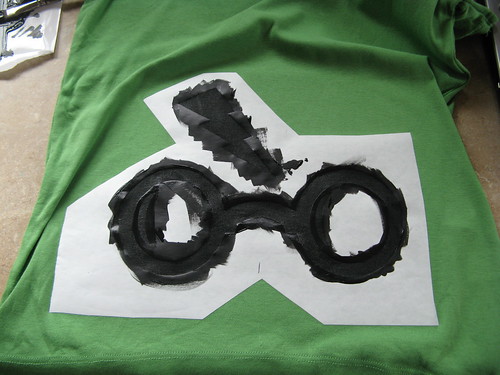
Peel away freezer paper. Be prepared to ooh and ahh over your cleverness.
Ooh! Ahh!
We’re almost done. We just need to heat set the paint to keep it from disappearing in the wash.
Cover your design with a cloth and press for 20 seconds with a hot iron.
Take a blurry photo to celebrate your success. You are amazing!
Have you ever worked with freezer paper? How did it go?
Like this:
Like Loading...
by Heidi Schulz | Apr 28, 2011 | Heidi Bosses You, Make Me
Heidi’s Guide to Eating Well For Optimum Health Sanity
A little gift for my sister:
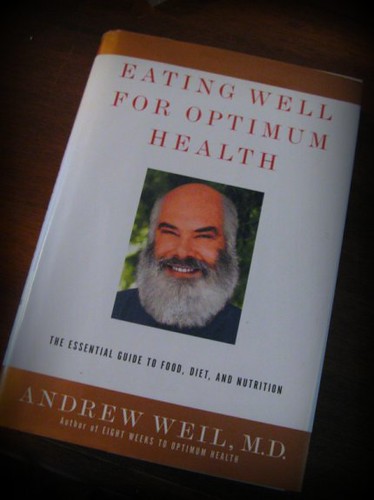
What’s that you say? Might be an interesting read, but what’s so gifty about a $3 book from Goodwill?
Haven’t you ever heard not to judge a book by its cover?
Perhaps you should check out the acknowledgments page.

Sidenote: I know this is not the neatest hollowing job ever, but thanks to my months of procrastinating, I had very little time to complete it. Besides, I don’t think she’ll notice the sloppy cuts when it is full of these:
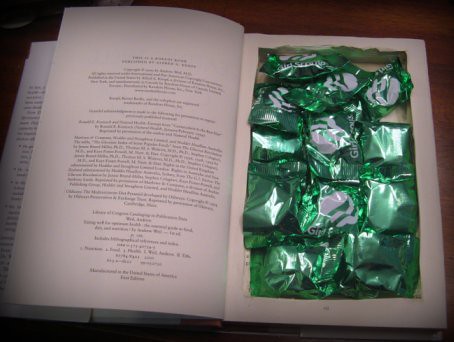
Mmmm… chocolate mint. That is eating well.
Like this:
Like Loading...
by Heidi Schulz | Nov 15, 2010 | Heidi Bosses You, Make Me, Recipes
Want to wow your friends and family while keeping your kids from whining about waiting for dinner having fun with your kids at the same time?
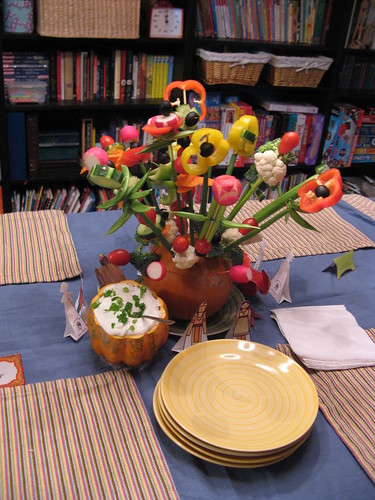
Last Thanksgiving Newt and I made an awesome centerpiece. Not only was it fun to make and pretty on the table, it was also edible! (which is more than I can say for the turkey…)
Supplies:
- One small – medium sized pumpkin
- One mini pumpkin or gourd
- Wooden skewers
- Toothpicks
- Green onions
- Assorted fresh veggies. We used red and yellow bell peppers, radishes, carrots, sugar snap peas, grape tomatoes, celery, broccoli and cauliflower florets, cucumbers
- Any canned items you usually use in a veggie tray: black or green olives, baby corn, artichoke hearts, mini pickles, etc.
- A hammer
- A nail slightly smaller in diameter than your skewers.
- A envelope of ranch seasoning and sour cream or your favorite veggie dip.
Directions:
Set up your work space. I found it helpful to set up an area away from the main food preparation so we could spread out and get creative. A folding table worked great.
Your mini pumpkin or gourd will hold the dip. If it’s a bit wobbly, cut a thin slice off the bottom to make it stand more sturdily. If you have a small ramekin or dish that will fit down inside it and hold the dip, use the dish as a guide for cutting off the top. If not, the dip will be fine without it. Hollow your gourd. Make your dip now so the flavors have time to mingle. (Follow directions on the back of the envelope.)
Cut the white part off your green onions. Slice thinly and add to your dip. Use your own discretion about the amount to add, a couple of tablespoons or so. Spoon prepared dip into your hollowed out gourd.
Using the wooden skewer as a measuring stick, trim the green part of the onion to about 3″ shorter than the skewer.
Now turn your attention to the larger pumpkin. If needed, cut a thin slice off the bottom to make it stand more sturdily. Remove the stem, if you like. Or leave it. It’s up to you.
Use the hammer and nails to make holes about an inch deed in the top of your pumpkin. These are where each of your veggie-flower stems will go.
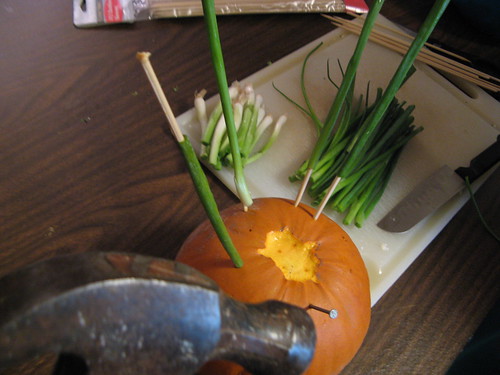
Don’t place your holes too close together; no less than 1 1/2″ or so apart. If you put a hole in a place you don’t like, just ignore it. It won’t be very noticeable.
Push the skewers down into the holes and cover them with a green onion “stem”.
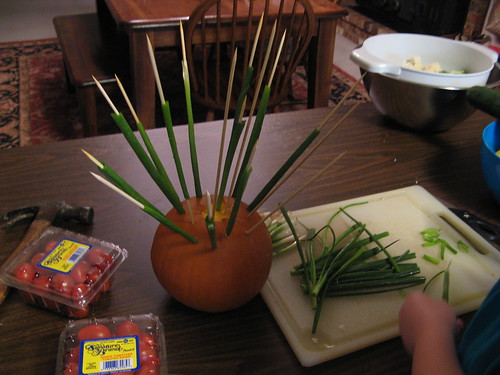
Now comes the creative and fun part. Use your other veggies to make flowers and petals for your stems. Push them onto the end of the skewer, using toothpicks as needed to help secure.
Ideas:
- Slice your peppers into rings. They look like flowers.
- Make radish roses.
- Use celery instead of green onion for some of the stems. Secure with a toothpick.
- Snow or sugar snap peas make lovely leaves. Again, a toothpick will be a big help here.
- Offer your kids a big bowl of cut veggies and see what ideas they can come up with.
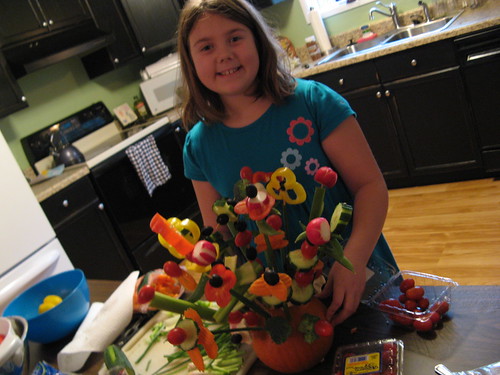
If you make one, I’d love a picture. I’d be happy to post a gallery of edible centerpieces here.
Have fun!
For another fun way to dress up your table, see my handprint turkey table runner.
Like this:
Like Loading...
by Heidi Schulz | Oct 30, 2010 | Heidi Bosses You, Make Me
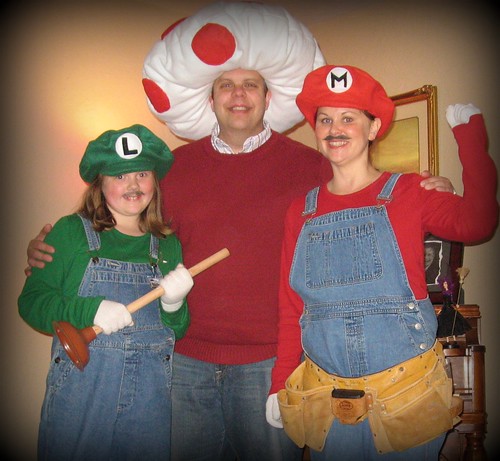
Newt has been planning these costumes since February. I made the hats based off this tutorial. Obviously, there was much deviation from the pattern for Toad. I went big, stuffed it with fiberfill and lined it with more fleece.
They were a big hit at our church carnival tonight. The best part? I kept chocolate gold coins in my tool-belt and handed them out with a “ping”.
What are you wearing for Halloween?
Linked
Like this:
Like Loading...
by Heidi Schulz | Feb 9, 2010 | Make Me
#1. Dino-mite!

Thrift store jar + potting soil + moss from my yard + plastic dino held in place with a couple of staples = my own tiny Jurassic Park
Roar!
#2. I must embroider these:

But on what? Ideas, please.
Found here
#3. Newt (Newt) is getting one of these in the mail for Valentine’s Day.

I can’t wait to see it (with the included magnifying glass, of course).
Order here
Like this:
Like Loading...